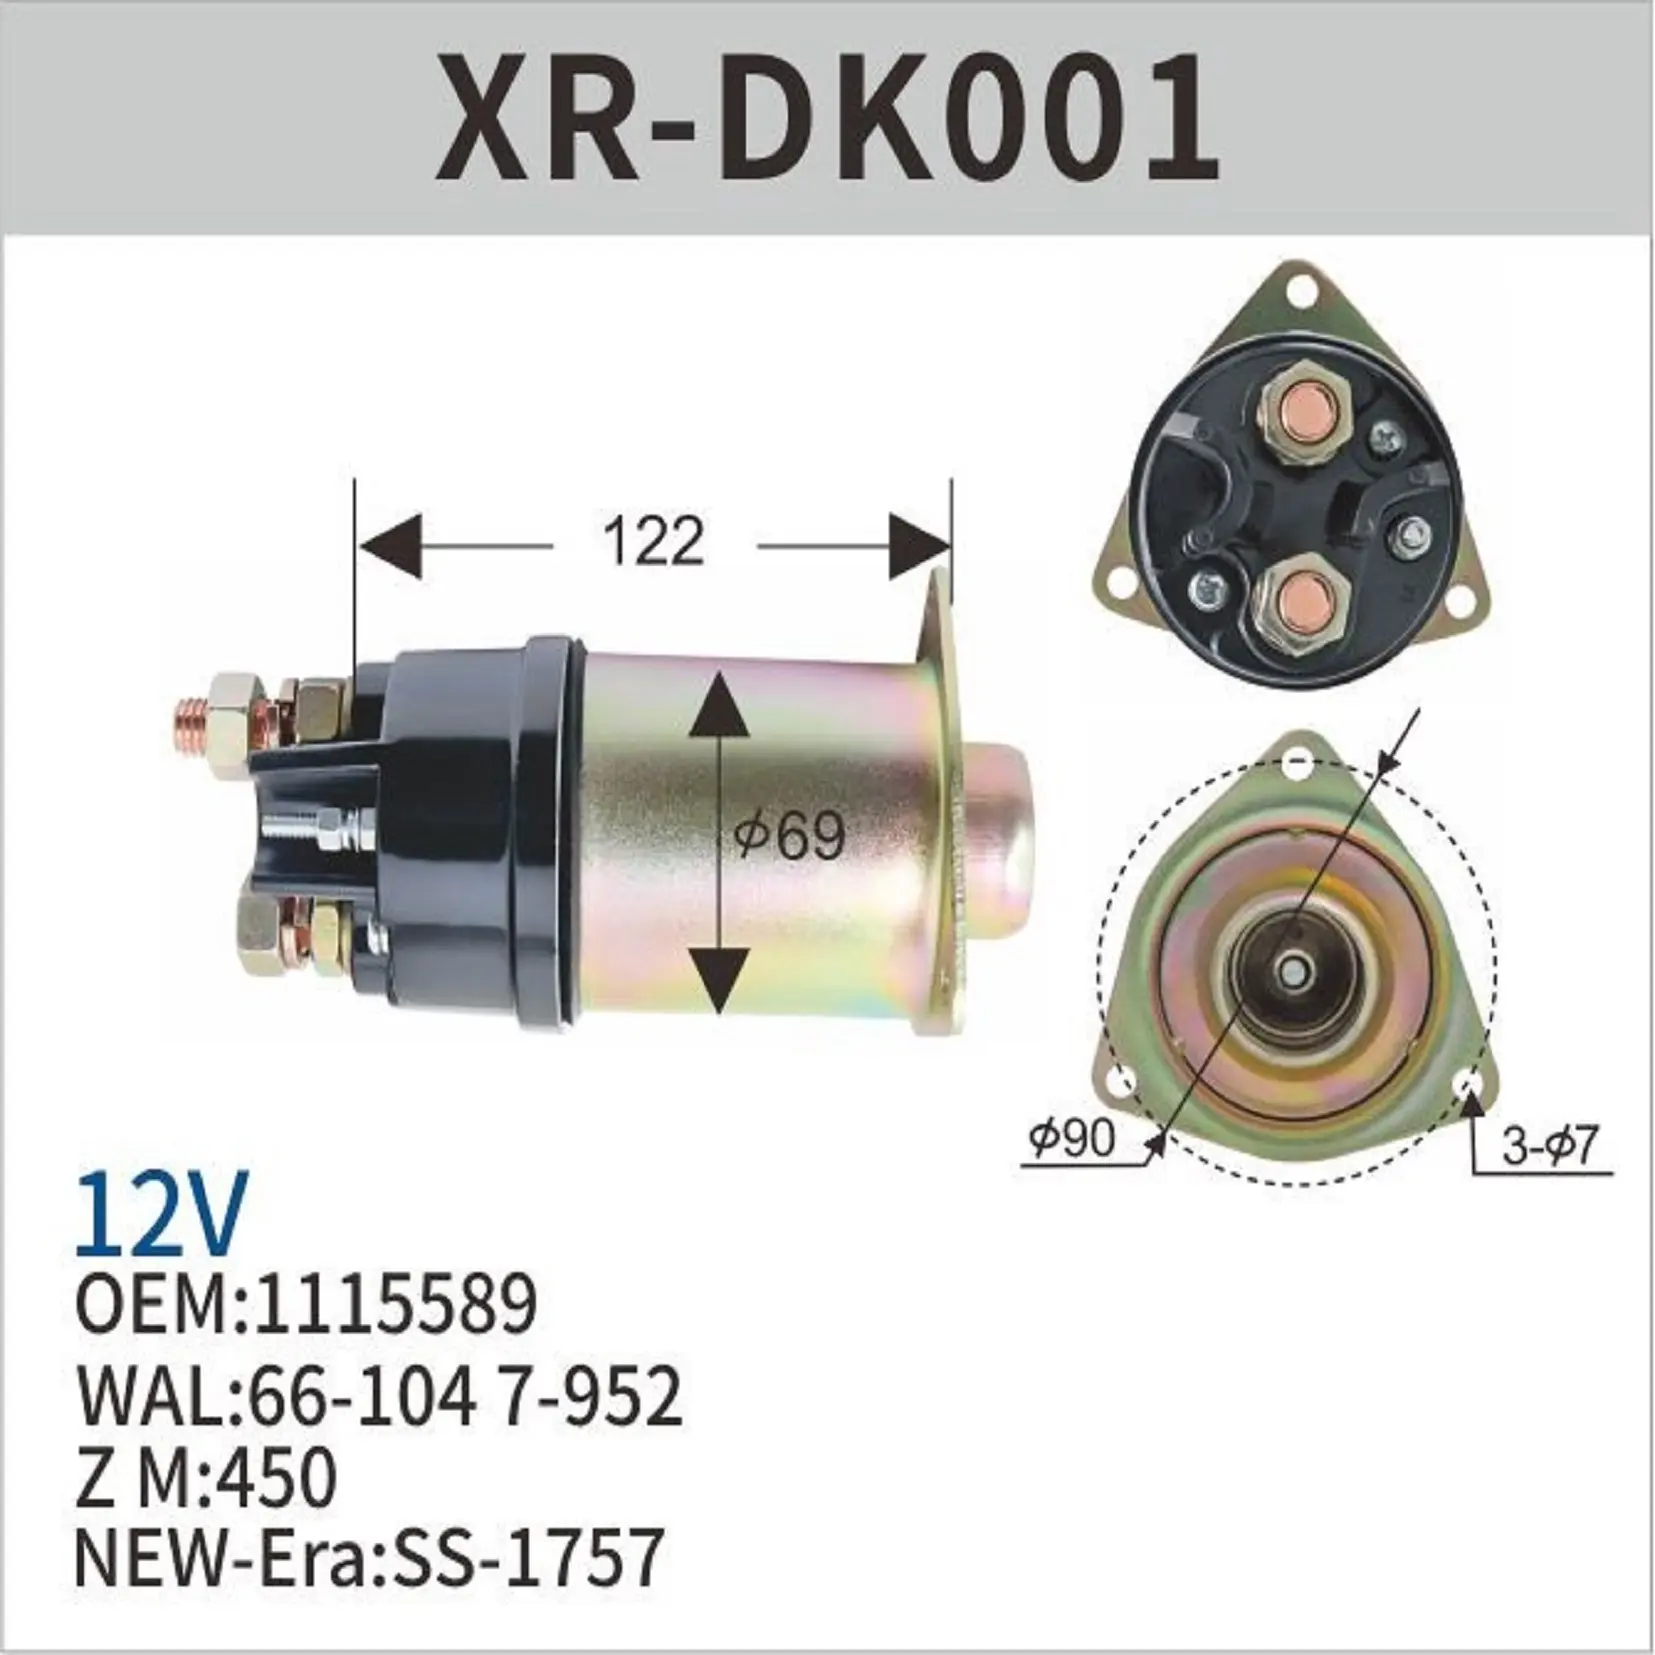
-

- [email protected]
- +86-57765185252
Solenoid switches are made use of to manage big current circuits with a low present switch. These devices contain a high existing button which is controlled by a magnetic actuator called a solenoid. When a small current circulations with the solenoid, the solenoid core will certainly move, compeling the high current button to the shut position. Depending upon the size of the solenoid, it typically has four terminals. 2 terminals are for the high present circuit and the other 2 terminals are the reduced current terminals of the solenoid.
Step 1
Locate the high-current switch terminals on the solenoid button. Inspect the paperwork supplied with the solenoid switch for the location of these 2 terminals.
Action 2
Cut two pieces of black cable as well as strip half an inch of cable off of each end of both cables. Connect one end of the first black cord to the unfavorable terminal of the 12-volt battery. Link the other end of that cable to among the high-current terminals on the solenoid button.
Action 3
Link one end of the second black wire to the 2nd high-current terminal of the solenoid button. After that connect the other end of that exact same cable to the unfavorable terminal of the DC electric motor.
Tip 4
Cut one item of red cable and strip half an inch of insulation off of each end. Connect one end to the positive terminal of the DC motor and connect the other end to the favorable terminal of the 12-volt battery. This finishes the high existing circuit.
Tip 5
Cut 2 pieces of black wire and also strip half an inch of wire off of each end of both wires. Attach one end of the initial cable to the very first reduced current terminal on the solenoid switch.
Action 6
Place one red cord between the favorable terminal of the 6-volt battery and connect the various other end to the second low-current terminal on the solenoid switch. This finishes the low current circuit.